Vanagon Redwoods

Vanagon Redwoods

Monday, October 2, 2017

Hella Loud Horns

I haven't had a solid working horn on my van since I bought it.  I checked everything out and it should work, but there's something funky going on at the steering wheel (aside from the brass ring) that is causing some frustration.

I thought I had it working good for a while, but then it would begin to honk in right turns or when I turned on my turn signal.  Finally I just unhooked the horn itself and went without one.   Last month, I decided to tackle the problem.  I ordered a new brass ring and installed it.  It seemed fine, but then started acting up again... so I ordered a new turn signal switch and no luck.  I'm convinced that there's a spacing issue with the steering wheel that is causing premature contact with the brass ring somehow.

Anyhow,  got fed up and decided I wanted new horns and a dash mounted switch, bypassing the whole stock system altogether.  I searched around and narrowed it down to 2 different type of horns, both from Hella, and after listened to various sounds clips on Youtube, ordered up a pair of the Hella Panther Sharptones on Amazon for about $30.  They have a slightly lower tone that their Supertone brothers, but I like the sound.   Here's a quick vid with some sound bytes at the end.


I chose to mount them to the firewall behind the passenger's side headlamp instead of down low where the stock horn mounts (behind the bumper).
These have a nice European sound to them and are extremely loud.  No longer will I get cut off in traffic without letting other drivers know how I feel.

Monday, August 14, 2017

WHY VANAGON LOVE?

There's a fair amount of hype over Vanagons these days, especially from the younger crowds.  For quite some time, it seemed like the Vanagon was the black sheep of the VW transporter line-up, and some might argue that it still is, but for some reason, they are finding their way into marketing ads, social media and the "wish lists" of folks across the world.

I see more and more people wanting to get into the "Vanlife" or specifically, the Westy life and Vanagon culture without any knowledge of the various models, history, reliability.  I think its great, but I usually warn folks that Vanagons are a commitment.  They aren't for everyone and require an immense amount of patience and money.  For me, it's a passion and a hobby.  I love working on my van, and I love what it provides me in return.

Adventure, Travel, family bonding and a simple, yet comfortable way of getting out of the city to camp on whim.  We keep Ferdinand stocked and ready to go so that we can jump in and go in a moments notice. Lately, my wife has been doing that more than me since as a merchant mariner and am out to sea for 5-6 weeks at a time. She used to be baffled by my obsession with Vanagons, but she now understands and endorses my sickness.

This whole #Vanlife movement, which is popular with the millennial and many of us "other" 30-60+ sumthin' folks is fueled by a simplistic lifestyle and adventure culture.  Folks want to give up their apartments and live on the road, seeing the sights, living simply.  But what is it about the Vanagon in particular that appeals to these crowds, despite their unreliable history and boxy demeanor?  After all, they are old, finicky, funky, fiscally draining and painstakingly time consuming with all their needs... but so damn cool in many ways.

I can't speak for everyone, but I can tap into my inner-self and elaborate on what they do for me, which from what I've gathered, hits home for other folks too.  Here's my bullet list (in no particular order) of reasons why I love Vanagons and how I came about to appreciate them so much.

-----------------------------------------------------------------

SWISS ARMY VAN
The Vanagon is the Swiss army knife of vehicles, the quintessential jack-of-all trades on wheels and potpourri of adventure goodness. Yes, there are many other vehicles that do many things and I like them too, however, few of them offer the versatility, culture, following, history, support and funk-factor that the Vanagon does. It is many things in one and offers a variety of uses and not just a mini-van for moving people around.

VERSATILITY
Show me an RV that can easily be driven daily for running errands, dropping off kids at school, picking up bags of mulch from Home Depot and parked in the front row of your Piggly Wiggly for your daily grocery needs.  I hear people ask "what about a Sprinter van?"  They are cool, but I wouldn't want to drive it everyday and if I'm not, where does it sit and collect dust when not in use? Nuff Said.

DNA

Mom and our bus
The first car I ever rode in was an 1969 VW bay window bus as my parents drove me home from the hospital.  I don't remember the van much, but maybe subconsciously I do and it's now part of who I am.  I've been obsessed with VW Vans since I was in my late teens (48 now).  The first one I bought was a 21-window splitty and since then, have owned 3 Vanagon Westys, and loved all of them. Had a 64 Baja for a while, but the Vans have always had more to offer for me.  I loved my '67, but I wanted something that could get me up into the mountains a bit quicker for those weekend mountain biking trips.

CULTURE
All the VW models have a following, but it seems like the vans have this "thing" that is untouchable.  If you drive one, you feel like you're part of this larger-than-life cult, that is very supportive.  We all come from different walks of life, but we all share a common bond.  We have different stories about vans and why they appeal, but in the end, we love our vehicles.  VW Transporters have a long heritage and you need to understand it before buying one.  There should be a quiz prior to ownership.

CAMPING and GETTING OUT
Yes, RV's allow you to be more comfortable.  Slide outs, full sized beds, showers, generators, satellite TV, storage so that you can bring everything from home... but wait, why go camping if camping is like home?  hmm.    I like getting out of my comfort zone a little and giving up the creature comforts.  The Vanagon, provides a few creature comforts that still challenge you a little.  Just enough space to bring the bare essentials, but still feel like camping.  Just enough bed for cuddling and other things, and a little extra bed for the kiddos or extra friends.  The fridge is small and makes you really assess what is necessary... beer, cheese, lunchmeat, eggs, a few yogurts and some fruit?  The stove and sink give you just enough for cooking, food prep, washing your face and rinsing some spoons.  You can't do everything in a Vanagon, so you're forced to get outside quite a bit.  That's the whole purpose of camping right? GET OUTSIDE!

COZY GOODNESS
The best part about camping in a Vanagon, is that you are forced to get close and cozy with your traveling companion.  It's intimate and very comforting when sharing the interior of a Vanagon on a rainy night with some candlelight and few iced cold beers.  I have fond memories sitting inside my van on a cold night, swapping stories with friends as we enjoy adult beverages and space to stretch out our legs on each other's laps while listening to the wind and rain howling outside.  I grew up on a sailboat and I like that small-space coziness that tight living quarters provides.


SOCIAL MAGNETS
We were camping with some friends about 6 years ago, us in our Westy and them in their trailer/toyhauler.  It was there, that I discovered that there's something inviting about a Vanagon with it's sliding door wide open, that invites folks to stop and chat.  When was the last time you stopped by an RV or camp trailer and chatted with the folks on the inside through their screen door?  It just doesn't happen, and in most cases, you can't tell if someone is inside an RV or not, it's very un-approachable.  A Vanagon has an open-door policy and invites people to come say hi, especially since most of the time, you're outside around the van, chillaxin by the fire and fixing something.  Most people have a story about a VW van somewhere in their history and they love to share it with you.
Somewhere really cool
SUPPORT
Quick roadside fix

I alluded to the fact that there's a strong amount of support for Vanagons, but it is more than strong, it's amazing.  I've seen vans stopped along the side of the road, helping each other out, and Facebook posts from stranded travelers, getting aid within minutes from other van folks nearby and driveways being offered up to provide safe camping for those passing through.  It's amazing in that sense and also amazing within the realm of products and services.  You can get just about anything for these vans within a few days and have multiple sources to choose from.


The Facebook Vanagon Owners Group (VOG) is huge (8620 members and growing) and there is an immense amount of information on there, and opinions, for Vanagon owners.  You can get quick answers to just about anything related to your van.  I really like the "search" option for looking up topics and solving mysteries.  I've learned a great deal through my fellow van owners and am constantly sharing what I know with others.  It's just a fun community and ton's of resources available for those just getting into them.


INVESTMENT YOU CAN USE
Granted, a Vanagon will drain your pocket book quickly, but there's a good chance it will retain a fair amount of your investment.  I like to say that the difference between a money pit and an investment, is your attitude. They aren't going down in price and only becoming more sought after each year.  I wouldn't say that they are "collectible"... yet, but highly appreciated and in demand.  How's the ROI on your savings account doing?  I'm willing to bet that your van is appreciating faster.  It's smart to keep it running good and don't let little things get away from you.  Nip those things in the bud before they become bigger issues, and learn how to fix them.  Vanagon aren't hard to fix, especially with all the support you can get online.  You can save a ton of money by DIY.   I've had my current van for over a year and have completely renovated the entire underside (Subaru conversion, transmission, brakes, fuel system, suspension, electrical, etc) and it hasn't been in the shop once. But then again, it's also my hobby.  I love to work on it, drive it, use it, look at it and sit in it and take pictures of it.  It provides so much more to me intrinsically than any other hobby.

If you can't relate to the passion for Vanagons, then it may not be the vehicle for you.  Think long and hard about it before committing to buying one if you haven't already.  It's more than a van, it's a lifestyle and you have to accept that there will be times that you'll be standing along side the road scratching your head.  Having said that, it will also provide you with some of the best memories and stories you've ever had.

Go, get out there and enjoy your van.

Ferdinand in his natural habitat. (Death Valley 2017)


Thursday, August 10, 2017

Parts Skimpin' vs. Peace of Mind

When I did my engine conversion in January, I dove in feet first.  I had never done one and was scared to mess it up, so I chose to do it right by buying some of the best parts available.  I went with the Rocky Mountain conversion kit with the whole kit and kaboodle, then went through my entire cooling system with new parts, fuel system, CV's, you name it.

After I had spent XX+X on parts, I was starting feel guilty and bad about the "no holds barred" approach.  One of the last things I needed was a good starter and had heard that the TDi starter was the way to go, offering more torque for the 2.5.  So I ordered up a conversion plate from RMW and started shopping for a starter.  The Bosch SR0408X is the go-to starter for this adapter plate and it comes out of late 90's/early 2000's VW Golf/Jetta, etc. but they can be pricey.  Since I had already spent my retirement on the motor conversion, I thought I'd save a little ($100) by using a starter from the wrecking yard.
Rocky Mountain Westy TDi Starter adapter plate
https://www.rockymountainwesty.com/Vanagon_Hi_Torque_Starter_Adapter_p/wv-001.htm


My local VW wreckers had a used starter for $90 and a 6 month warranty, so I figured, what the heck, why not.

So, I get the starter mounted up, motor installed, everything plumbed, wired, etc, etc and he (Ferdinand) fires right up almost instantly.  Awesome!   I proceeded to get him all dialed and road ready for the Spring Break road trip we had planned.

Motor and trans ready for install
Fired up and running great!
April comes and we head out on a 1600 mile trip throughout Death Valley, Southern Nevada and Utah.  9 days of fun, backroads, camping, hiking and exploring.  I didn't have one problem with the Van for that entire trip... not one.  Completely stoked about how things went down and glad that I spent the money I did on the van when I did.

We roll back into our hometown, pull up in front of the house and I shut the van down.  We opened the garage and then I went to fire it back up to back into the driveway and ... click. Nothing.  Hmm.   Well, at least it happens now, right?

So, I let it sit for a bit, we unloaded it where it was and then I tried it again, and voila, it fires right up.  This happened periodically over the period of the next 2 months, only when hot, the notorious "hot start" issue that I had read about.  I chased wires, check plugs, added dielectric grease, but couldn't nail down the exact cause.

Finally, my wife drove the van once or twice and experienced it in traffic when she accidentally stalled it and almost got stranded a few times without knowing what to do, so I needed to figure this thing out.  I suspected it was the starter, or potentially a bad cell in the battery, so I had my friend take a look at it and he did some tests and concluded that it must be the starter.

So, that's when I realized that the 6 month warranty had just expired a few weeks earlier, (I was out of town for few months during those 6 months, so it came up fast) and I was going to have to buy a new/remanufactured starter.  I shopped online and ended up getting one for about $200 (60 of which was the core deposit).

Bosch SR0408X Remanufactured replacement 

So, it arrived and my friend offered to put it in for me while I was away for work, and the problem is now solved... it was definitely a bad starter.   So, to sum things up... you can save some money here and there on your van, but be prepared pay the price down the road.  Just don't let something small be the determining factor for your road trip success.  I tried to save $100, but it ended up costing me and extra $100 in the end all said and done.  Lesson Learned!   The van gets, what the van wants... eventually.

Thursday, August 3, 2017

Center Console Project

I have a million custom projects in my mind that I want to tackle with Ferdinand.  One of them has been a center console with cup holders and storage.  There are a few options online that you can purchase, but none have caught my attention, or if they did, I felt they were over designed and expensive.

I built a small console shelf for my first Westy a few years back so that I'd have a place to put my phone and a couple of water bottles underway, but it lacked storage.  It worked great for a while and then I sold the van.

Last fall, I was heading out to a campout in Ferdi and wanted a cup holder, so I looked around the garage, found an old wine box, cut 2 holes and voila.  I figured that would get me through the weekend and I could tackle my "real" console later.  Well,  that wine box lasted almost a year before I finally got around to doing the console.
My "Wine Box Quickie"

Here's what I had listed for "console criteria".

1. storage for small items. chargers, wallet, flashlight, 2-way radios, paperwork... things that typically would end up in the glove box.
2. Cup holders!  2 for travel mug/coffee cups and 2 for larger water bottles (32oz+)
3. I wanted to still be able to step through to the back of the van
4. I wanted it to be able to support my weight
5. I wanted the storage to be less obvious in case some non-vanagon-privy tweaker broke in, he might not realize that there was a compartment there.
6. I also wanted it to look like a custom fit and not just a box on the floor.

quick sketch of what I wanted
So, I began making some sketches and taking notes from other consoles on the market.   Vanagon Life has a steel locking console ($600) that I really liked, however it was out of my price range and it didn't make use of the area near the shifter, which I wanted to incorporate.  I liked the extra attention to detail put into it, so I tried to think about how I could do the same with mine.
Vanagon Life Console

So, here's what I came up with using 3/8" Birch Plywood and some 1/2" Pine.  The side pieces are attached to the seat bases with self tapping screws (just 4).  The forward part of the console near the shifter has no screws and fits so snug that you can't budge it.   I have a shift boot coming to seal off the hole around the shifter.  I plan to install a small secret compartment just aft of the parking brake that I can store a few items and potentially a kill switch.

Total time to build it, was about 4-5 hours including one trip to Home Depot for wood.  I used a jigsaw for all my cuts and added some dark stain to finish it off.   I also have a piece of carpeting cut out (not pictured) that lays onto of it so that you can't tell it's a console.

The advantage of using wood, is that I can cut holes if needed, mount things with screws easily and wood is easy to work with.  I also rounded off the edges around the parking brake so it's easy to get your hand under it.   Total cost, about $50 including the hinge and stain.

framing it in. Notched for the seatbelt bolts. Eventually I'm going to upgrade to the newer belts with longer receptacles on both sides.  

Framing the front around my Big Shot Shifter

Add caption


The divider is a support to hold the weight of one large adult.

Stained and ready for action


Doubles as a Cornhole game on rainy days.  
This was a fun project, pretty easy to do if your good with a jigsaw and creativity.  I absolutely love it.

Sunday, May 7, 2017

Modernization of a 35 year old box on wheels

I have a decent job and I make decent money, but newer cars mostly bore me and I'd rather put my money into an older car that is appreciating in value.  Yes, it would sometimes be nice to have a new car that just "goes" when you want it to and is comfortable and safe.  But I also like tinkering on cars and I love driving something that is different.  I find immense satisfaction when someone pulls up along side of me and gives me a thumbs up or a "nice van" comment.  It's a feeling of accomplishment, plus it's a hobby that I enjoy.

My daily driver has almost always been "different".  I've had old Landcruisers, and newer ones that were modified, old VW busses, Bajas, etc. and I've enjoyed every one of them. Even when I've had more modern cars, they were always different in some way.  My current van is my baby and I plan on keeping him for a long time, but I'm also constantly looking for ways to extend his life and make him more comfortable, modern and safe.

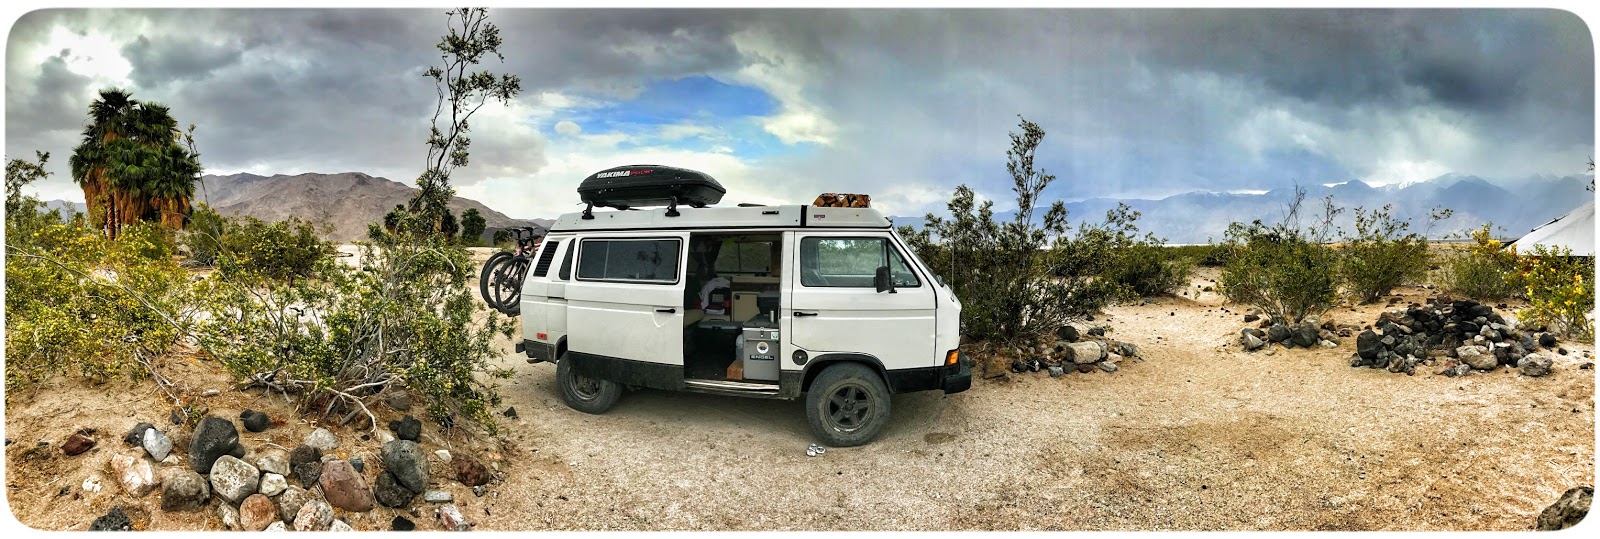
"Ferdinand" is an 1982 Westfalia camper van that I've converted from diesel to Subaru power.  I wanted something that would keep up with traffic and not bog down in the hills when loaded up and traveling.  Now that the motor is done, I'm looking at other things that will make him look younger.  He had many parts missing when I got him, so I've had the opportunity to upgrade things in the process of making him whole.
The day I brought him home
He is 35 years old, but there are many options and aftermarket add-ons out there that will take years off his appearance.  These are simply ideas on things you can do to help enhance the look of your van or simply bring it up to par with regards to age.  Vanagon were only made until 1991, but many things changed between 1980 and 1991.

I love my '82, but I also love looking for ways to hide his age. I've done a few things to my van, but here are some other ideas.

Disclaimer: I do not claim to be a Vanagon expert by any means and am learning new things about these vans everyday.  There are tons of resources out there and lots of folks who know way more than I do about these wonderful creatures.

------------------------------------

Potential Westy facelift ideas:

-Wheel Upgrades:
Not only can you get a more modern appearance, but upgrading to a larger rim and tire can sometimes add stability or even reduce rolling weight of the wheel (steel vs aluminum).  I have an older set of Ronal R9's on my van, which are kinda vintage, but kinda more stylish than stock. I also run a Yokohama Geolandar A/T tire for more offroad durability and traction.  Watch the load ratings, especially if you have a full Westy camper.
Ronals with new Yokohamas

-Upgraded Grill:
Lots of folks upgrade to the South African (SA) grills, which give the van a more modern appearance.  I personally am not a fan of the square headlights so much, and my older van has the round 7" lamps.  I'm choosing to stick with this look for now because it seems like everyone is running the SA grills and I like to be different, but I have upgraded to LED lamps, which make a huge difference.
South African Grill

-Lights:
I mentioned LED headlamps, but you might consider going through all your lights and upgrading to LED bulbs.  Not only do they last longer, but they are a crisp bright light and will give your van a more modern look.  The LED dash bulbs are a great upgrade and they help you see things a bit better, plus you can get them in different colors. There are lots of cheap options out there now for LED driving lamps, flood lights and even decorative lighting for the interior.  A couple battery powered puck lights placed throughout the van make a big difference when you're trying to find that one "thing" while your significant other is sound asleep.

-Mirrors:
Upgrading to a power mirror assembly from a newer van is a great way to decrease the "mirror flop" that has plagued so many older vans over the years.  It's no my list of things to do, OR upgrade to a truck mirror.  The power mirrors need not be color matched, just paint them black or use an undercoating paint for a more durable finish. I'm leaning towards the power mirror upgrade myself.

-Windows:
Newer vans have a vented rear quarter window.  It was supposed to help create a vacuum affect which helps with ventilation, but it also helps create less of an air pocket and allows your doors to close more easily... so I've heard.  You can also find sliding rear quarter windows if you prefer more ventilation, but be expected to pay a pretty penny.  Some manufacturers also have metal window inserts should you want to eliminate your window entirely.  See Rocky Mountain Westy for examples.
Tinted windows give a nice look to the van, decreasing temperature inside the van as well as privacy to boot.  I prefer a 20-25% tint all the way around.  Sometimes the 5% tint is too dark to see out of at night when you hear things rattling around in camp.

-Bumpers:
Lots of options out there.  I'm currently looking to upgrade my rear bumper so that I can move my spare tire to the back of the van and add some add-ons like Rotopax jugs, bike rack, ladder, etc.  Give the van a more rugged look, while adding functionality and even more protection. Pictured below is a Rocky Mountain Rear bumper with dual swing-away add-ons for spare tire or storage.  There are many options out there.  I'm leaning towards a setup like this on my van.
RMW Rear bumper and swing-away setup.


-Undercoating:
I like the look of having the rocker panels painted black.  I think it breaks up the huge body panels a little and makes the van look a little taller than it actually is.  Not only does it change the appearance, but it also protects the lower part of the body from nicks and chips.  I like the Rustoleum spray can product because if it gets chipped or scraped, I can touch it up in seconds.


-Canvas:
Chances are, that your van will someday need new pop top canvas.  Mine did and I wanted something that would make him look younger, so I chose a grey canvas.  Most early vans had tan canvas, so I figured what the heck, he'll look younger when his top is up.  My interior is still mostly tan... for now. I opted for the inexpensive cotton Bus Depot special for $249.  I love it and it works great.  I thought about paying for a custom color or Acrylic, but I figured for the price, I could afford to swap it out every few years if need be.  Installed pretty easy and took about 4 total hours of work. I added silicone spray water-repellant for extra protection against rain.  Works great!

Canvas after install

-Paint:
If your van is showing his or her age and needing paint, why not go with a more modern color?  Sometimes the standard VW palette indicates a certain age of the van.  I like all the stock colors, but why not mix it up a little and stand out.  Mine is white, but has been repainted to a brighter more modern white and I like it.  A full window-out paint job will be costly, but worth the investment.  These vans aren't going down in price, so why not add to your investment with a fancy new color.

-Interior:
Let's face it, that old upholstery design definitely corresponded to an era.  VW made some good upgrades over the 11 year span of the Vanagon, especially with regards to interiors.  I'm currently on a hunt to find cushions from a newer van to give more modern look to the van and add a bit more cush at the same time.  I've already upgraded the front seats and that made a HUGE difference in comfort...  the arm rests alone were worth the money.  Drapes can be swapped out to something a bit more modern as well and you might consider implementing a black-out fabric for the day-time naps. Upgrade to a Sewfine interior and trick it all out, or make your own.  I'm currently in the process of replacing all my interior panels and adding new fabric... cheap, yet time consuming.
Potential new fabric.  Stapled on temporarily for now to see if we like it.  Note old nasty fabric. yuck.

-Brakes:
Stock Vanagon brakes CAN be pretty decent if dialed in properly.  Mine work great, but I replaced every single aspect of the system from the master, booster, cylinders, pads, shoes and had my original drums and rotors turned.  However, you can upgrade to a "big brake" kit which gives you better stopping power now that we are loading our vans down with all kinds of cool stuff.  You can also opt to upgrade your brake booster to a BMW E30 booster, which will give you more power, but I still recommend making sure everything else in your system is functioning perfectly before you start adding more power to the system.
Also, remember that if you decide to upgrade your engine, you'll be averaging higher speeds and therefore needing more braking forces.  On that note, take a look at my other post on Van Weight.  It plays in closely with the topic of brakes. See "Braking me Bad" for the troubles I went through to make my brakes work.

-Comfort:
There are lots of things that add comfort to your Vanagon experience. Cold beer for instance can be something that makes those long hot days behind the wheel more tolerable.  I'm not talking about "DURING" the drive, but something to look forward to upon arrival at your destination.  The stock Vanagon fridge in a camper just doesn't cut it. I highly recommend ditching the fridge and opting for a portable fridge like an Engel, ARB, or some other brand.  My wife bought an Engel MT45 and it's amazing.  We still carry a small ice chest for ice, but it's nice knowing that your produce isn't swimming around in water after day 2 of a trip.  If you're adding a fridge, consider upping your battery system or aux system so that you can stay parked for a while and keep that beer cold.  See my post on Aux system upgrades.
LOVE LOVE LOVE this fridge.  Don't forget to secure it in place so that it stay put in an emergency

Add a memory foam topper to your bed.  These 35 year old cushions are "ok", but why not wake up feeling like a million bucks and less like a wadded up $50 dollar bill.

Insulation!
I completely took apart the inside of my van and added various layers of sound dampening and insulation to make it quieter, warmer in the winter and cooler in the summer.  It's not hard, but it takes time.  Read my write up here.

-Awnings:
Sun and Rain... both of which can be a pain in larger quantities.  Get an awning!  I've had a few different types of awnings on my vans and have been researching a new one for "Ferdinand".  Basically, the 2 most popular are the ARB 2500 and the Fiamma F45s.  The ARB is simpler, less expensive and requires a little more effort to put it up, but still easily deployed.  The Fiamma is about 3x the cost and super simple to deploy... just crank it out.  I like lightweight stuff and probably won't be needing the awning very often, so I'm leaning towards the ARB.  They are both nice, but I'm a simple person. :-)  Don't forget brackets... most awnings don't include them.

-Center Console:
Do something.  Buy a box and cut some holes, or pick up something fancy from Rhino Designs, but definitely get something to hold your cup, your phone, your whatever.  I took a lightweight wine box, (the type that holds three wine bottles from the winery and has the sliding lid), and then cut 2 holes in it as a quick fix before a road trip.  Well, guess what?  it's still in there.  Granted, I have plans to build a nice console between the seats, but I simply haven't set aside the time yet to do it.  There are some fancy steel designs out there, but you'll pay a pretty penny.  Get creative and see what you can come with.

-Storage:
On the topic of creativity, look around.  These vans have little hidden spots here and there for storing and/or hiding things.  In the door, under the seat, within the panels in the back.  There's even a couple spots in the back cabinet (Westy's) that if you make a few jigsaw cuts, you can add a nice little hiding spot for tools, weapons, valuables, etc.  There's a nice spot for an umbrella or machete in both front doors.  I'll let you find it.  Take a look at the area just about the rear cabinet door in your Westy.  A jigsaw would open up a nice little spot for hiding things, but you'll need to pull the cabinet to do so.
IF you don't have a battery under each from seat, set up a way to use that space for something.  I keep a bottle jack, tow strap and jumper cables under mine because my car battery is now located under the rear seat.  Organize your spaces.  The container store is a great place to find little containers and things to help organize the cabinets, nooks and crannies.  Bring a tape measure (and the van).
5 minutes with my jigsaw, allows me to slide a tray under here with tools and other quick engine needs.


-Seatbelts:
Before our last road trip, I spent the money for a 3 point seatbelt for the back.  It's not a super-simple upgrade because you will have to modify your panels for the retractor access, but well worth the safety factor for your passengers, in my case, our son. Everything bolts right up, but the retractor goes behind the panel, therefore you need a small hole/slit for the belt to pass through.  The driver's side requires cutting a hole in the cabinetry if you have a Westy, but again, worth the time and effort.  GW sells the kit, or hit up your local wrecking yard and see what they might have.

After install. New panels awaiting fabric

-Air Conditioning/Heaters:
If you don't already have A/C, you can add it.  It's a complicated addition, but well worth it.  I will add it at some point, but for now, we are A/C-less.   I will also be adding a Propex heater as well for those winter trips.  A bit easier than an A/C install, but again, well worth the investment depending on your part of the world. SmallCar makes a kit for the install.


So, that give's you some things to gnaw on.  I'll probably add more as I think of it.  Enjoy and hopefully there was something there that was helpful.


Van Weight

There are a ton of upgrades available to Vanagon owners nowadays and I certainly am interested in adding quite a few of these to my van as well.  I have an upgraded power plant that pushes my van along with lots of power, so I don't worry about the weight so much with regards to making it go.  I can put 4 people and a ton of crap in there and still cruise up into the mountains at 70mph.  However, stopping and turning must still be addressed.

I've spent a ton of time to make my brakes work the best they can, and they do.  I can lock them up if need be, but I typically drive as if I can't, in other words, I give plenty of space to cars in front of me and always assume that someone is going to give me a reason to slam on my brakes.

I've also added HD sway bars and better springs to help with the handling and it can swerve better than a stock van with less risk of a rollover.

I've seen a bunch of vans out there loaded to the gills with all kinds of "stuff" and I don't always get the impression that they've thought about weight distribution and how it affects handling.

Question:
Did you think about weight distribution when you loaded the van, keeping heavier items down low and lighter items up high?  This comes into play with regards to cargo pods and stuff that is your cargo tray and on your rack.  
Weight behind the rear wheels can affect your rollover potential drastically, so it's best to avoid heavy items to the rear, and always keep weight as low as possible.

In the case of a rollover, is your cooler or other heavy items secured in a way to prevent it from flying around and hitting your passengers?  You'd hate to see one of your children get hospitalized because of a head injury caused by a box of ?? that was laying on the floor.   It could happen. My Engel Fridge weight about 50lbs empty.  I was sure to strap that thing down to protect my son who sits just a few feet behind it.

Enough of the darkness and doom.


With regards to braking forces... I try to think of my Van as more of the "backpacking" version of camping, so when I research new products, I try to take weight into consideration.  I try to keep it light and not carry unnecessary stuff, water, etc.  It requires more planning sometimes, but worth thinking about.  An ounce of prevention is worth of pound of cure in this case. 

For instance, if you're road tripping with other Van folks, check and see what they are bringing.  It might make sense to collaborate so that you're not doubling up on things just to "be prepared".  On my last road trip, there were a few tools I didn't toss in because I knew that my buddy had his and vice versa.  Water is heavy, so you might not need to fill your tank completely.  Is there water where you are going?  I got rid of my stock tank and installed a 6 gallon portable jug and I carry an extra 4 gallon jug sometimes when I think I'll need it.  Haven't run out yet.

I've seen guys put 6 gallon containers of fuel up on their roof. 6 gallons of fuel is about an additional 50lbs of weight up high that is going to help put your van on its side when you swerve to avoid the dog.  I know it sounds cruel, but I'm going to hit the dog and not take the risk of of hurting my family should that ever happen.

I drove commercial 15-passenger vans for about 8 years and the one thing you learn, is don't swerve unless you have to.  Eventually, the company I worked for moved away from 15 passenger vans because of all the reasons listed above.  We were always very careful not to overload the rear of the vans with weight.  There's tons of information online about passenger van rollovers and safety, much of which can be applied to our beloved Vanagons.  I suggest to troll around on the intrawebs and take some notes.  I hate seeing posts from people who have learned the hard way.

These vans are awesome, but lets not forget that they aren't modern 
sportscars and need a little extra attention when driving.

Some reading/resources:


Thursday, May 4, 2017

Front End Rebuild

After I finished my engine conversion a few months ago, we took the van out for a shake-down overnight road trip.  I was super excited to get it out on the highway and see how it performed.  We got everything packed up, met up with our friends in their Vanagon "Sedona", and then hit the highway.

The initial acceleration up to 60 was amazing and I continued to bring it up to highway speeds (65-70) and started to feel some shake in the front end, coming through the steering wheel.  It continued from 65 on up regardless of the speed, unless I was in a long curve, in which case, it would go away.  So, we proceeded on our trip and I just drove a little slower to minimize the wheel shake.

After the weekend, I crawled all around under the van and made a short list of what I needed to order.  My initial thought was:
-Tie rod ends
-Steering rack bushings and boots
-Upper ball joints
-Wheel bearings

My upper control and lower control arm bushings, as well as radius arm bushings were in pretty good shape, so I ruled those out.

I knew that my tie rod ends and steering rack bushings were shot, so I figured these parts would take care of the problem.  I had also planned on doing new springs and shocks at this time, so I knew that I'd be getting a new alignment and wheel balancing after the work was done.

So, I dove in.
diving in
I did the front end first: Tie rod ends, new tie rod boots, steering rack bushings, upper ball joints, springs and shocks, then the rear as well.  If you haven't worked on springs before, you should know that most of the time you can get a way with no spring compressor for the rears, but you'll definitely need them for the front.  I found that it also helps to loose the radius arm nuts a little, which allows the front A-arm to drop a little lower to get the springs in and out.  On my rear springs, I added a 1/2" spacer to compensate for the sag when the van is fully loaded.  You'll see a pic below of the van unloaded, and then loaded.  It sits slightly higher in the rear when empty.

While I had it all apart, I also pulled the rotors and drums and had them turned/machined and replaced the bearings upon their return as well as new brake pads all the way around.  I had addressed the rear shoes a few months back as well as brake cylinders because they were leaking.
disassembly process
The rear bearings on these vans are pain in the butt.  You have to pull the hub which involves using a large breaker bar and a 46 mm socket or the EMPI tool and a lot of force.  You also have to remove the brake assembly (but you don't have to disconnect the brakes, just move them aside) and then 4 bolts on the backside to release the hub.  It's a pain, and I don't recommend if for those that aren't handy.  I don't have pictures of the rear process because my hands were too dirty and bloody to grab the camera.  :-)
compressing/installing the new springs (front)

new rear springs and shocks


All of this took me about 2 days and it went pretty well.  It also helps to spray PB Blaster on the nuts/bolts that you'll be removing. I typically do it a day or so before so that it has time to settle in.

Once I got everything put back together. I took it in to get the wheels balanced and front end aligned.

I picked up the van, and took it out for a spin...

Got it up to about 65 and guess what?  It still had a shake in the front end?  Damnit.

So, I went back into the alignment shop and talked to them.  My contact there is super cool and he knows his stuff.  He thought maybe I might have a bent wheel, but he had his alignment guy re-check everything and do "perfect balance", which in their secret code, means, take the time and do whatever it takes to make this vehicle roll perfect.

So, they did.  I picked up the van a few hours later and the problem was solved.
So, what was the problem you ask?

My wheels are aftermarket Ronal R9's.  They are cool wheels that I picked up a while back and all balancing weights had been placed on the inside of the rim.  Well, apparently, that's the preferred way to balance a wheel unless it's having some issues, in which case you can then add weights to the outside.  So, that's what they did and solved the problem.

In retrospect, I didn't need to do ANY of the front end work to get rid of the shake, however, I had planned and wanted to anyhow, just so I could rest assured that the van was safe and riding as good as possible.  It was on my list of things to go through during the "rebuild" anyhow.

Also, when I picked up the van, the alignment shop let me know that the tires I had on the van were not up to par with regards to load rating and that I should consider replacing them.  I made the decision to go ahead and replace them with a larger all-terrain tire.  I chose the Yokohama Geolandar A/T in a 215 75/15 and have been extremely happy with them.
New suspension, tires, etc.
New Yokohama Geolandar A/T's
Van fully loaded in Death Valley
So, we did our road trip.  9 days, 1600 miles and a ton of backroad/washboard driving in Death Valley, then into Nevada, Utah (Zion, Bryce, Kodachrome) and back.  The van performed AMAZING.  It rode great, handled great, had tons of power and I couldn't be happier.  We didn't have any problems whatsoever during the entire trip.  I did find a small rattle in the front end, that I think is steering box related, but it didn't affect the steering or handling of the van.  I'll be addressing that soon to figure out what it is.

Parts installed during this upgrade:
-Schwenk Springs
-1/2" Spring pads (rear)
-Koni Adjustable Shocks
-Upper Ball Joints
-Steering rack bushings
-Tie Rod ends
-Tie rod boots
-Wheel Bearings (all 4 wheels)
-Brake pads (front)
-New tires (Yokohama Geolandar A/T's (215 75/15)
-and I had all drums and rotors machined

"Sedona" & "Ferdinand", outside of Bishop, CA


Tuesday, May 2, 2017

Auxiliary Battery Install

Ferdinand is running good and ready for some excursions, yet I still have many small projects to attend to (and always will).  One of the most recent upgrades stemmed from my wife buying me an Engel MT-45 portable fridge for my birthday.  Awesome gift, especially since we were getting ready to do a 9-day road trip in the van.  However, I knew that our standard car battery setup was not going to suffice and that I needed to make some upgrades. My Westy is an '82 and did not already have an Aux battery installed, so he was a blank slate for the most part.

I had been researching this for the past few months, and had settled on a setup that I ran across online from Ken Wilford (you can find a video he made on Youtube).  He utilized a few smaller 12v, 22Ah wheelchair batteries that fit perfect in the box beneath the drivers seat, in fact, you can fit 4 of them in there.  These are a sealed, lead acid battery and you can find them on Amazon for about $35-40 each and free shipping.  I chose to start with 3 because that affords you a little extra space under the seat to mount your relay and run wires a bit easier.  I figured that I could always add one more later if my energy demands are too high for this setup (see next paragraph).  I also have an empty spot under the passenger's seat for yet more batteries in the future because my engine battery is now located under the rear seat.
UB 12220, 12v 22Ah.
I bought mine on Amazon
Next, figure out your energy demands and battery needs.  You begin by figuring out what you plan to run off of your Aux battery setup.  Lights? Stereo? Fridge? Sink Pump? Inverter? Other?  Then make a list and try to calculate/log what each of those devices will draw per hour.  This will give you a number to start with.  The calculations from this point on get a little more complex, and I'm no expert, so I would recommend referring to various websites to help explain it.  I will however post below the quick calculations that my friend drew up for me and my application so you can see what I did.  The particular setup was done somewhat temporarily for our 9-day trip, knowing that we were not going to be sitting in any one spot for more than 3 days, and it worked perfectly.  I also didn't want to spend the extra money on a solar panel that I may or may not need.  I already had a smaller one in my possession, so decided to start with that.


The smaller batteries are wired in parallel, which keeps the same voltage and adds the amperage, so 3 of these 12v, 22Ah batteries wired in parallel, will equal 66Ah, but remain at 12volts.
 Here's a quick reference to how they "should" be wired to help equalize the load and charging on the batteries.
The pic of mine below is not wired for best longevity/performance, but has since been remedied, see if you can find the problem. Disregard the red wires on the negative side.  I had lots of red wire, so decided to use it up.
Located under the driver's seat
So, once you've got the batteries, you'll need to think about how you're going to charge them.  I purchased the Aux Battery charging kit from GoWesty, which is essentially a large solenoid/relay, a fuse and some wires.  What this does, is it isolates your aux battery when the key is off and separates them from your car battery so that you don't drain your main battery when camping.  When the ignition is turned on. the relay connects both batteries so that the alternator is charging everything.

I also chose to install a small solar panel up in the cargo tray to help extend the life of the aux system when we're camping.  It's a small panel for now, but I plan to add a larger one later for extended life.  My small panel is approx 16"x16" and acts like more of trickle charger.  On our last trip, I was able to run my fridge (and sink pump occasionally) for at least 3 days.  I still have my radio wired to the car battery, but we use a bluetooth speaker connected to our phones for music anyhow.
If you're using a solar panel, you'll need a controller.  The one in the picture below, runs about $25 online and offers 2 USB ports for charging your devices. Works great, but is slightly hard to read the screen in the location that I chose.  Just something to think about if you buy this one.

I also put in a fuse block so that I can add on more things as time goes on.  I've since wired in a cigarette lighter port for my fridge to plug into.

This setup was done pretty inexpensively and cost me about $180 total all said and done (batteries, controller, aux wiring kit and solar panel).  You can spend more and probably less, but that's what I paid and am happy with the results.

There are many different ways to go about this and you'll read about folks who run utilize huge solar panels and enormous battery banks.  It's really up to you and your needs.  For what we do, this works great.

Wednesday, February 1, 2017

Tank Contaminates

If you read my post regarding the Subaru swap, you know that I had some issues with the tank.  I thought I'd elaborate a little more here so that hopefully nobody else gets caught up in that mess.

My van is/was an 1982 Diesel.  The fuel tank is 35 years old and until recently, had never been resealed.  I bought a seal kit a few months back and tackled the job.  It requires dropping the tank and replacing 3 small rubber grommets, one large grommet for the filler neck and the o-ring that goes under the sending unit.  My filler neck grommet was bad and I couldn't fill the tank without it leaking.
VanCafe's reseal kit "B" with the metal fittings. I used the plastic version.


Replacing all of these is pretty easy, but dropping the tank can be a pain, mainly due to all the expansion and evac lines that run to it.  I've now got it down to a system and can drop the tank in about 15-20 minutes.  It just takes some practice.  The crossover tube is by far the most difficult to re-install, but it helps to remove the strap that hold it up so the floorboard of the van.  I now leave mine off.  Also, I've found that if your spare tire is removed, as well as the clam shell, you can access the driver's side part of the crossover tube a bit better, especially if your hands are big.  I have trouble getting my arm/hands in above the shock tower, and then when I do, I'm limited on movement.
Crossover tube/fitting on the driver's side.
So, when I replaced the grommets, I inspected the tank and everything on the inside was smooth and clean with a nice coat of diesel fuel inside of it.  Diesel is really an oil, so it protects thing nicely.

My new motor is a gasser, so when I installed it this month, I removed the tank again, and emptied and rinsed it out with gas.  I added a few gallons of gas, shook it around, tipped it up and down and tried to free up anything that I could.  I figured that the tank was now ready to accept gasoline on a regular basis... so I thought.

After the conversion, I added fresh gas (approx. 5 gallons) and got the motor running.  It ran great.  After getting everything dialed in and road-ready, I took it out for spin and it starting loading up/bogging down.  It did it a few times and then eventually stalled.  I recognized the issues as fuel related, so I dropped the fuel pump and filter and immediately saw crud on the inlet side of the pump.  I took the outlet hose off the tank and nothing flowed out, and when I could get flow, it had a bunch of silt in it.

So, I dropped the tank again and inspected the contents.  Full of crud and the inside walls/bottom were nasty with all kinds of "junk".

Looking in through the sending unit port.  The 3 marks are where I scraped some samples with a screwdriver.


The "fresh" unleaded fuel that came out  :-0
So, I've deduced (without too much research), that the gasoline has eaten away and loosed up anything that was in the tank or in the bottom catch basin that had built up over the last 35 years, and it was now all loose and ready to flow into the fuel system.

Luckily, my fuel pump and filter caught it all I'm pretty sure the injectors never saw much debris coming their way.  I'll probably inspect those next and run some injector cleaner through the first few tanks in my brand new fuel tank.

I ordered a Spectra VW3C tank from Amazon a few days ago and it's scheduled to arrive today.  I did some research and it "appears" that most of the distributors/resellers are sourcing the same tank.  There are numerous threads about this on TheSamba.  I opted for Amazon because we have a prime account and the shipping was free.  I cringed at the $40 shipping costs from my favorite Vanagon suppliers and decided to chance it with Amazon.  I've read good reviews on the Spectra tank and don't anticipate any problems with it.  I fully recommend ordering from the Vanagon specialists when possible, but after having just spent $1000000000 on my conversion, I'm feeling cheap for at least a week or two.

Tank Differences:
If you ARE replacing your tank, you should be aware that there are 3 different types of tanks.  The main difference is the size on the filler tube hole and the outlet fitting.  My diesel tank had approx a 74mm filler hole, which I think was common for 1980-83, then it got smaller in 84-85 and even smaller from 86-91.  Just double check what you need.  Filler necks are easily swapped, but also hard to find.  I upgraded to the newer style tank because it also has a 12mm outlet, which allows more flow and also mates up nicely with the fuel pump which has a 12mm inlet.  However, I had to find a newer style filler neck made of plastic, but it also comes with an anti-siphon valve on the end.
Newer style filler neck (plastic)

the New Tank arrived (Spectra VW3C).

Van Cafe has a nice write-up on the difference of the filler tubes and how you can tell the difference.