Vanagon Redwoods

Vanagon Redwoods

Friday, October 21, 2016

Cabinet Mods

When I had my Westy Weekender, I loved the full width rear seat.  You could prop a pillow up and sit sideways at the table... It was cozy and comfy.  Now, I love my full camper, but the extra cabinets do hinder the comfort factor slightly, unless you're willing to operate a saw and get all mad scientist on it the way I did.

I had seen a few vans where they chopped the cabinet down (the one aft of the cooking cabinet and next to the seat) in order to add more chillaxin lounge space, and I liked it. So, I pulled that cabinet out, took some measurements and went to town.

I had planned on decreasing the water tank size anyhow, so removing it wasn't a problem for me.  I'll be adding a 4-5 gallon fresh water tank under the sink pretty soon.

Originally I was going to just chop it down and re-use the top, but the way it's made, doesn't allow for east deconstruction and re-contruction, so I just picked up some 3/8" Birch and made a whole new top, keeping just one access port/cubby on the backside.  The lower access on the front side, is plenty for what I need to store.

In the back cubby, I cut out some birch and lined the inside nicely.  I may end up raising the floor in that cubby and creating a hidden compartment for valuables at some point.

When re-upholster the seats/cushions, I'm going to have a small pad made for new bench area that matches and then keep a few pillows in there that will double as our sleeping pillows.

I also made sure to buy enough birch to lay down a new floor and did that at the same time.

Future cabinet plans include converting the rear cabinet to be about 4-5" thinner in an attempt to have more shoulder room.  I'll be staining and sealing the wood (floor too) as well to protect from spills/stains.

Thursday, October 13, 2016

Braking Me Bad

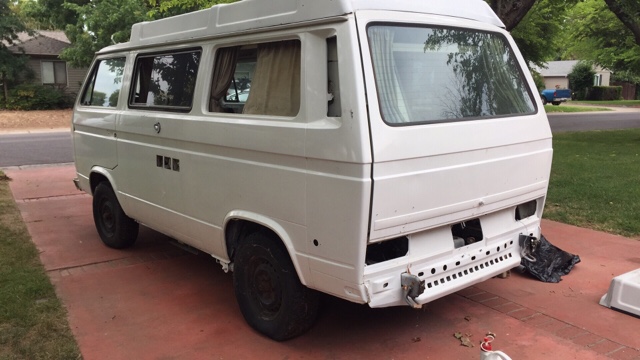
Ever since I picked up Ferdinand a few months back, his brakes have been an issue.  I first tackled the rear drums because I had a leaking wheel cylinder and I purchased all new parts (wheel cylinders, shoes and hardware/springs).  It helped a little, but there was more going on beside just worn rear components.  The drums were smooth, so I didn't have them machined.

The front pads looked near new and there were no leaks, so I skipped over those and dove into the dash to take a look around at the hydraulic system.

If you are new to Vanagons, you'll soon realized that the master cylinder, brake booster and fill reservoir are underneath the instrument console.  You simply pop off the console to fill your brake fluid.  It's kinda weird pouring fluid into your dash between the speedo and the clock, but it works.

Upon inspection of the booster and MC (master cylinder), I noticed a fair amount of rust underneath the MC and what appeared to be brake fluid leaking slowly from the booster so, I began researching parts, namely the brake booster itself.

My braking symptoms seemed more booster related because the brakes would work great on the first press of the pedal, and then they would be full manual (no power) on the 2 press of the pedal, so I assumed at this point that the booster was bad or that I had a vacuum line leaking air somewhere.

I checked my check valve in the engine compartment and it seemed fine as well as the line leading all the way forward to the booster.  So, I picked up a "newer" booster from my Vanagon parts friend and began tearing apart the dash.

You can upgrade your stock booster to that from a BMW (E30 booster), but it requires a little adaptation that I didn't want to mess with right now.  That and having a bigger booster on a 35 year old braking system seemed like trouble waiting to happen.  I might eventually go that route, but I'll want to upgrade other components before I do so.

The stock booster is big and hard to remove. You have to pretty much disassemble the drivers side of the dash to get at it.  After removing the steering wheel, steering column, upper console, master cylinder and the 2 dash supports, I was able to squeak it out of there.  It's a pain and I don't recommend it for the non-mechanical person.  In the process, I also pulled the clutch master and checked it over for leaks as well, tried to clean up the seals in the process.

After getting the booster out, I did everything in reverse putting in the newer one, starting with the pedal assembly and clutch master, then the booster, followed by the MC, all of it's lines plugs and dash supports. I then re-assembed the steering column and steering wheel.

I then had to re-bleed the system because I had taken the clutch master off the pedal assembly to get the booster free.  In retrospect, I shouldn't have done that because it added a great deal of extra time because of the bleed job, but it seemed like the only way to get the pedal assembly and booster out of the dash.

The clutch bleeding didn't go well and I ended up hitting up Harbor Freight to get a pressure bleeder which helped a great deal.  Best $30 I've ever spent.  The problem was because I didn't bench bleed the clutch master before re-installing, but the pressure bleeder took care of that.

All said and done, the brakes were "better", but still fading on the boost after the first press of the pedal.  I was bummed.   I went back online and did some research and decided that the MC was bad and ended up ordering a new one from Van Cafe (because I can get stuff overnight from them PLUS a chocolate chip cookie!) and planned to swap out the MC the next day.


Today, I dove into it, bench bled the MC and installed it without a hitch.  I then bled the entire system and voila! brakes are feeling awesome.  I'm pretty sure the MC was the culprit all along, but my booster was looking pretty bad as well and it was probably just a matter of time before it gave up the good fight.

The best part of the day, happened while I was under the engine bleeding my rear brakes and decided to investigate my ongoing oil leak a little further.  upon inspection, I found that the oil was leaking from a bolt hole in the block that was somehow missing its bolt.  Not sure why or where, but I found a bolt, filled the hole and my oil leak is gone.  bam!  Happy camper... literally.

Took him out into traffic (something I've been afraid to do until now) this evening and hit up Trader Joes, but not without admiring him the evening sun.

Monday, October 3, 2016

Headlight Superbright! LED upgrade

Lights... we need them and the brighter the better.  I've always been in search of brighter lighting options by adding driving lights, fog lights, LED's etc., in an attempt to see better and make older vehicles a bit more modern.

My '82 Diesel had original 7" lights with stock grill and I wanted to upgrade the lights without changing the look of the front end.  Many folks opt for the SA grill swap these days, but for some reason, I'm partial to the original stock grill.

In search of brighter headlamp options, I ran across VintageCarLED's and was sold on the idea of going with LED's on "Ferdinand" the van.  On previous vans, I ran the H4's and was happy with the output, but they had a pretty large voltage draw and would get pretty hot when sitting for too long.
So, after exchanging a few messages back and forth with Thomas at VintagecarLED, I ordered up a pair of VC3500 Classic's that are rated at 3500 Lumens.  

Once they arrived, I was impressed right off with the quality of the product right out of the box.


Easy installation and it only took about 10 minutes start to finish.

Here are the comparison pics in my driveway.
My iPhone camera doesn't do it justice, but the lights are amazingly bright and crisp.


Before and after of the lights in the grill. Huge difference!

VC3500 Specs from their website:
Wattage: 25W
Voltage: DC 12V – 24V
Flux: 3500Lm
Lifespan: 30,000 Run Hours
Color: 6500Kelvin (Pure White)
Operating Temperature: -40F to 180F


Great simple upgrade and I highly recommend these lights or any other models that they offer.


Monday, September 5, 2016

Stock Bumper Facelift

I will eventually replace my front bumper with something a bike more substantial. The one that came with the van was slightly bent, the rub strip was missing and the chrome was looking a bit tarnished.

 So, I decided to throw a little black satin paint on it and call it good.

However, I decided that I wanted to make it different.   My original thought was to put stainless carriage bolts across the front to give it somewhat of a riveted industrial look, but there's not a great deal of space behind it for a nut. So I removed all the bolts that hold the rub strip on and bought small black plastic plugs to fill the holes.  

After that, I added some grip tape strips to the top so I don't slip off when climbing up to check the cargo space.

Simple quick hack.

Sunday, September 4, 2016

Skylight Rebuild

My poptop came from a newer van, so luckily, I get a skylight.  Most of the early model pop tops didn't have a skylight.  Well, mine came with a hole and an actual skylight lens, but no hardware or seal.

I put it off for a while because the weather was awesome and I wasn't concerned so much.  About 2 weeks ago, I knew that I was going to be heading back to work for about 5-6 weeks and didn't want to leave the van with a hole in his top.  So, I bit the bullet and ordered up all the necessary pieces from GoWesty to install the skylight.

You can purchase the entire skylight kit from various manufacturers for about $150ish+, but since I already had the lens, I had to piecemeal it together and order all the small parts individually.
GoWesty kit   or   BusDepot kit

After it all arrived, I laid it all out, cleaned up the hole in the pop top the best I could, opened up Youtube to the GoWesty channel and followed the simple instructions.  All said and done, it took me about 25 minutes and it turned out perfect.  
Pretty simple project if you have old and worn out mechanisms on your skylight.  At the very least, you might consider replacing the seal as they get compression-set and can become less effective with age.

Wheel Upgrade

14" wheels are too small but they work.  Most everyone who owns a Westy long enough will upgrade to a 15" or even a 16".   My van came with 14" steel wheels, complete with rotten tires that I wouldn't trust on a trip around the block.  However, tucked away in the back of the van, was a set of 4 15" Ronal R9's with damn-near brand new tires.  I just needed to get some longer lug bolts/nuts and clean them up a bit.

Ronal has been making wheels for a long time and I didn't know too much about them aside from seeing the name now and then.  I guess they were pretty popular in Europe at least from what I can gather.  I did a little research and finally figured out mine were R9's.  They had been painted and re-painted quite a few times, so I had my work cut out for me.

My typical approach when painting wheels is this:
-Pressure wash
-Degrease
-Sand lightly
-1 coat of self etching primer
-sand
-2 coats of wheel paint (In this case, a satin black on the outer part of wheel and a texturized paint on the spokes since these already had a texture on them).  I use a brand of paint from Autozone, it runs about $8/can.

It took me about 6 hours worth of work, but they turned out pretty good and gave the van a whole new presence.  

Eventually, I'd like to add a more aggressive tire, but that will come after the suspension upgrade.

Interior Panel Rejunevation

Ferdinand is 34 years old and his interior panels are original.  When I bought him, he'd been sitting in a field for 2 years and was missing some windows.  Needless to say, moisture had gotten in and warped some of the panels.  The paper coatings were bubbling and looking bad, but I didn't really care at the time because I knew that I was going to rip them all out at some point and replace them with an upgraded material.

However, once I got him home and started to strip him down to bare bones, I found that most of the panels were still in pretty good shape aside from the paper coatings (I call it wallpaper) coming off.  I left this project off the initial priority list because I didn't care about the aesthetics so much as getting him running and trustworthy.

Well, a few weeks back I was satisfied with the progress and decided to develop a plan for making the interior looking better.  I spent an hour or two peeling and cutting away old paper off the panels before deciding to pull out the heat gun.  Once I fired that up, things really started to take action.  Using a razor blade and a small putty knife, I was able to get all of the old coating off the interior to expose the raw panel in all its glory.

The material had an interesting texture and appearance that reminded me of bamboo or tweed, or a mixture of the two.  At any rate, I kinda like it and for now, I'm leaving it.   When I'm ready, I'm going to be pulling each panel and applying some sort of paint, but I need to decide on a texture, color... or potentially I may decide to try and apply some fabric using a high-heat spray adhesive.

I really like some of the aftermarket interior kits you can buy, but I get more satisfaction out of crafting something on my own, not to mention the cost savings.